
In June 2013 I released version 1.0 of Swipe Tap Smash, a Windows Phone game written in C# using XNA. By December of that year I was releasing version 1.2, and with it had implemented most of the major features I had wanted to add to the game. For the next version, the goal wasn’t to add any new features, but instead to port to a whole new platform: Android!
I decided to take the approach that many other developers out there have taken or are thinking about taking: using MonoGame to bring my XNA game to Android. Although it seemed like many developers out there were taking this path, the road was not as smooth as I expected, and there was a lot of trial and error that I can hopefully reduce for others.
When I first started looking at the port to Android, it seemed really simple. And then it quickly got really, really confusing. There are a lot of new terms and workflows, and they all seem to meld together, muddying the problems I ran into. Looking back now though, there are really 6 main areas of the port that need to be considered:
- MonoGame.Android
- Xamarin
- Android Platform
- Google Play Developer Console
- Google Play Game Services
- Google Developer Console
I’d like to talk about what each of these are from a layman’s point of view, with a focus on how they fit into the Android port of a game. I won’t hit too many low-level details, but instead just try to give a lay of the land for those just starting to look at porting to Android using MonoGame.
MonoGame.Android
As you probably know, the XNA library is only available for Microsoft Platforms (DirectX, Windows Phone and Xbox 360). MonoGame is an open-source project to recreate the library on more platforms such as Mac, iOS, Linux, and of course, Android.
All versions of MonoGame live in the same library, and all versions are written in C#.
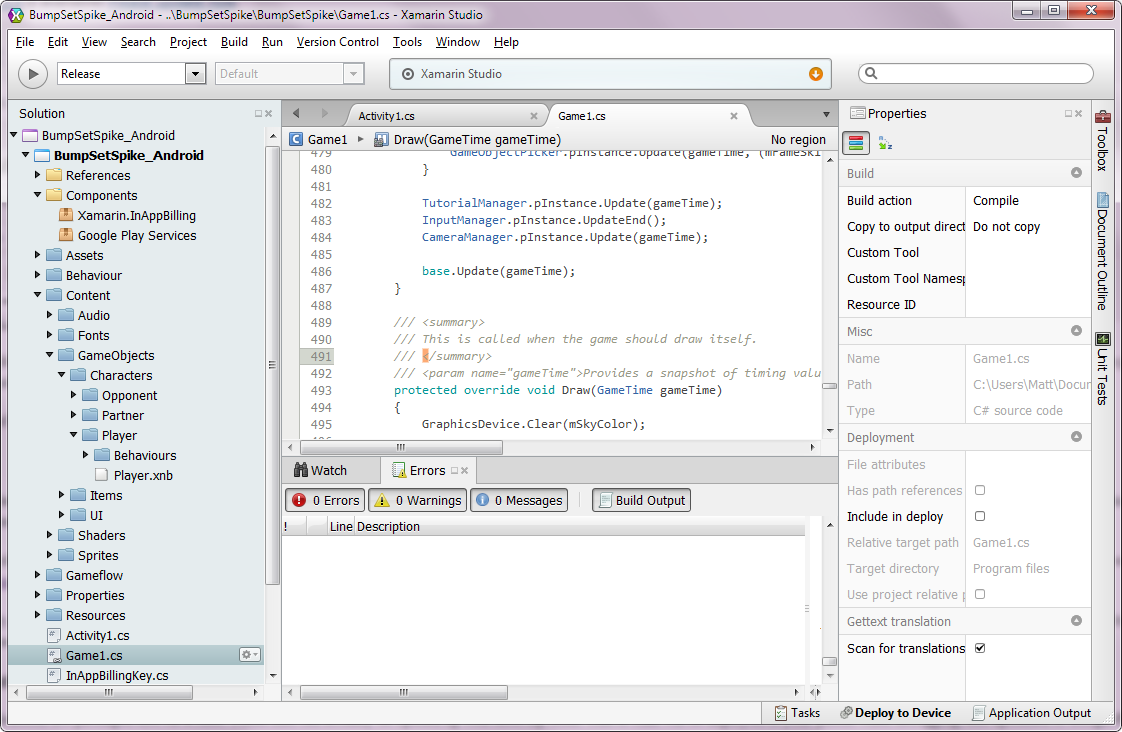
Xamarin
But if MonoGame is written in C#, how can it run on platforms like Android that don’t have the C# runtime? That’s where Xamarin comes in. The team at Xamarin have essentially ported C# to Android, and built an IDE around it (Xamarin Studio). XNA was built on top of the core C# runtime libraries, and so MonoGame also has that same dependency. Xamarin.Android provides those runtime libraries.
Platform specific functionality is provided through something call “Components”. These packages are installed through Xamarin Studio, and contain C# ports of common platform libraries. For example, Xamarin provides a Component for Google Play Services which was used extensively in Swipe Tap Smash for things like Achievements and Online Leaderboards.
Unfortunately, Xamarin is not free. They have a free version, but it has a app size limit that will be reached very quickly by most games. It will however give you a chance to install it for free and try it out a bit before committing money.
Android Platform
Android applications are packaged into APK files. These files can actually be opened up with most zip tools. This is what will be deployed to your phone when debugging, and uploaded to Google Play when shipping.
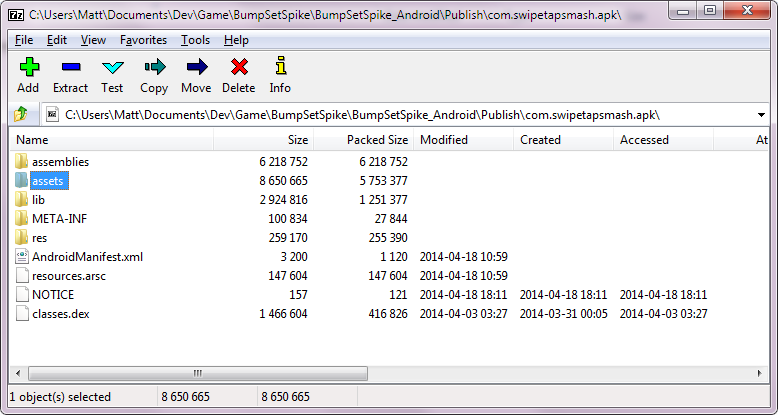
The most confusing part of all this is “signing” process. APK get “tagged” with an encrypted key when they are built. That key is then verified by Android to make sure the application is who it says it is.
The key is generated through a something call a “Key Store”, the process of which can be found elsewhere online. When running your game from Xamarin Studio or testing with manually installed APK, you will use the built in public keystore provided by Xamarin. This process is mostly automated. When it comes time to upload your game to Google Play, you will need generate your own unique private keystore, and sign the APK with that.
Google Play Developer Console
There are a few Android storefronts out there, but the one I chose to focus on is Google’s own Google Play store.
The Google Play Developer Console is where you provide the Google Play Store with all the information about your game. Screenshots, videos, feature list, and the app itself all get uploaded here. It is also where you will define In-App purchases (IAP) if you have them, and where you set the price of your game.
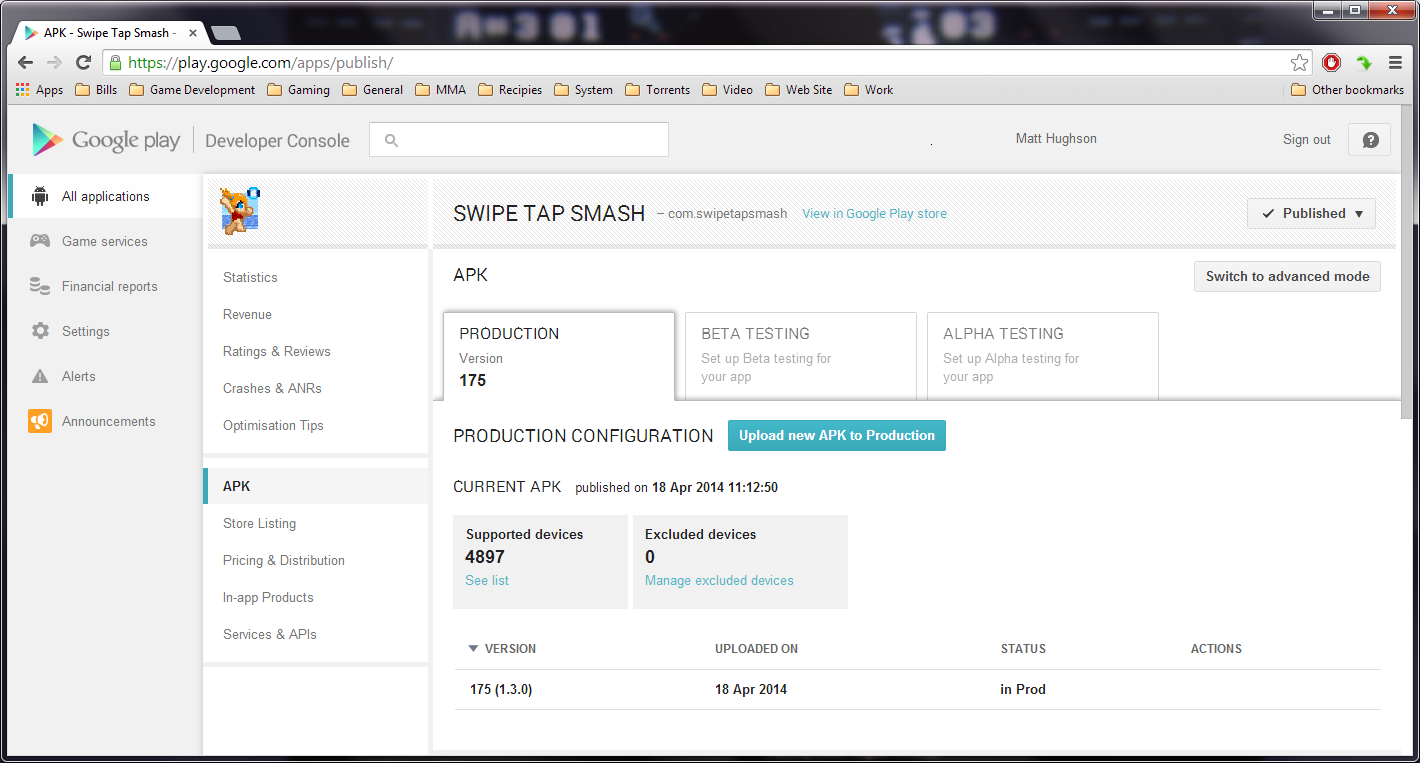
Once your game has been released, this will also be where you go to release updates, and track the stats on your game.
They also have support for Alpha, and Beta testing. This will allow you to grant access to your app to a select group of people before going live on the Google Play Store. It also allows you to download your own app with a different Google account. This is really important for testing In-App Purchases, as Android does not allow the developer account to make IAP in their own app, but you can manually install it on another account when going through the Google Play Store.
Another important note is that you cannot use the In-App Purchase API without uploading that specific version of the game to Google Play. If you try to, you will get a popup telling you that IAP is not enabled for that version of the app. Remember though, uploading an APK to Google Play will not automatically publish it to the storefront. It will sit as a draft until you publish it. While it is a draft you will be able to test the IAP API.
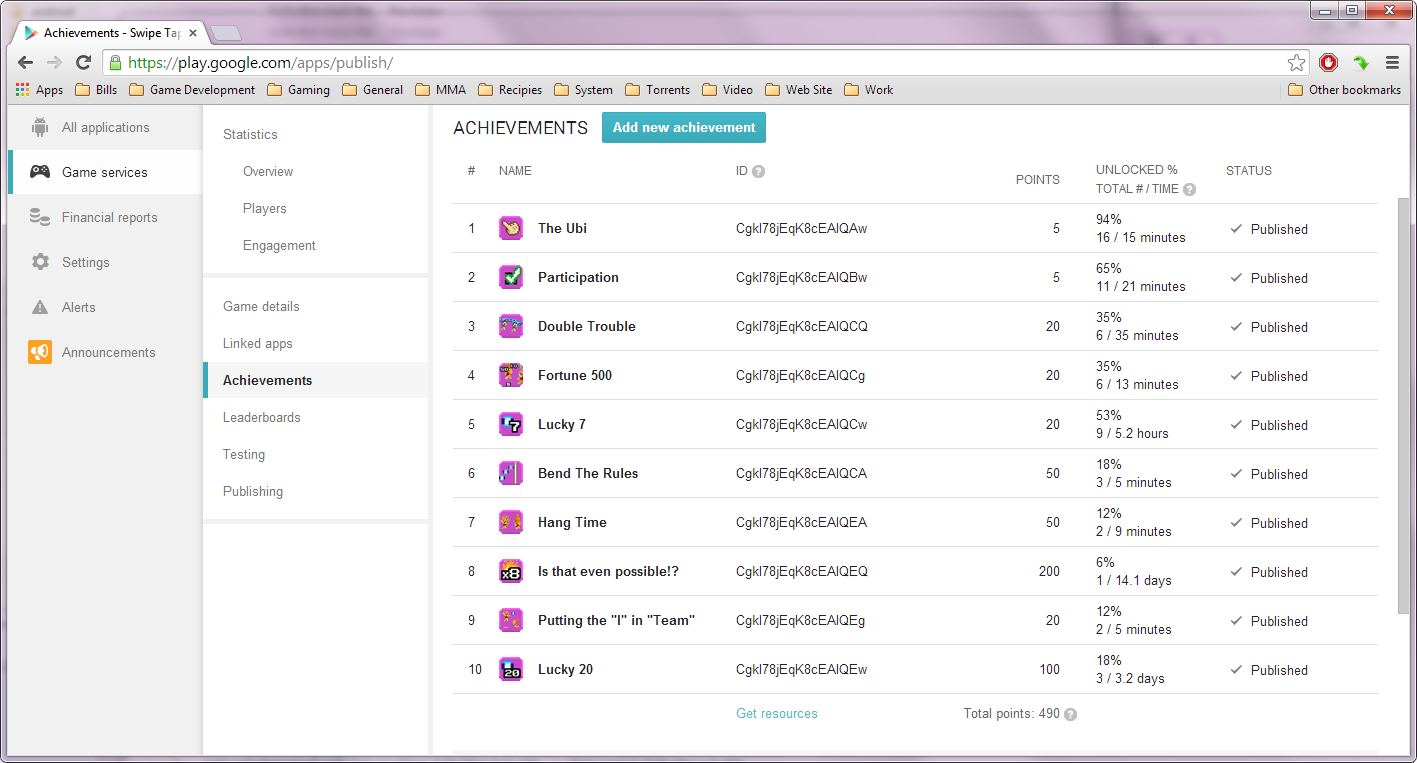
Google Play Game Services (optional)
A sub-section of Google Play is Google Play Game Game Services. Here you define things like Achievements, Leaderboard, and multiplayer services. These are not required to publish a game and do add a lot of complication to the process of porting.
One confusing thing here is that you must create an instance of a Google Play Game Service (with information about achievements, leaderboards, etc) and then manually link that to an app that you have defined in the Google Play section. You don’t just define the Google Play Game Services in a section of Google Play.
This separation makes more sense when you think about how Google Play Services are cross platform (they can be linked iOS apps and more), so it wouldn’t make sense for them to be defined inline to the Google Play Android App.
Now before you start using Google Play Game Services, there is one more step. You still need to gain authorization, and that is done through the Google Developer Console.
Google Developer Console (optional)
There are 2 main sections of the Google Developer Console that we are interested in: APIs and Credentials.
APIs is where we enable different Google services for you products. This isn’t just for games or Android. Many (if not all) of Google’s services are controlled through here (maps, search, hangouts, etc). For the basic Google Play Services API you need to turn on “Google Play Game Services”.
The next section of interest is Credentials; possibly the most confusing part of the whole process. Credentials are used when making calls into the different Google APIs. They let Google know that you are a trusted app.
There are 2 types of credentials: OAuth and Public API.
Public API is for APIs that don’t require user consent. For instance bringing up a Google Map. There is no sensitive information about the user accessed here, so you don’t need to request their consent. When using this type of credential you often pass the credential itself as a parameter to the Google API.
The second type is OAuth. This is what Google Play Game Services uses. This is used for API calls that allow you to access sensitive information about the user. Before making any calls to these APIs the user will need to consent, which is handled by Google when you attempt to connect to the Google Play Game Services at runtime. You will need to set up 2 OAuth credentials: one for the public-keystore version of the app (used for testing), and another for the private-keystore version of the app (used when uploading to Google Play).
Hopefully this quick primer can help you through the initial deluge of new terms and workflows that come with MonoGame.Android. If you have any questions, or corrections, please let me know. I’d be happy to address them!
I have noticed you don’t monetize your blog, don’t waste your traffic, you can earn additional cash every month because
you’ve got hi quality content. If you want to know how to make extra bucks, search for: Ercannou’s
essential adsense alternative